How to Use Putty for Linux: Step-by-Step Guide
Putty is a widely used SSH client that allows you to remotely access Linux servers. In this guide, I’ll walk you through how to download, configure, and use Putty for Linux. Whether you’re accessing a server on your LAN or a remote server, these instructions will help you get set up quickly.
Downloading Putty
If you’re not sure where to download Putty, you can click here to download Putty. Choose the version that corresponds to your operating system. For example, if you’re using Windows 64-bit, download the Windows 64-bit version.
Once downloaded, simply open the file to start using Putty.
Setting Up Your Server Connection in Putty
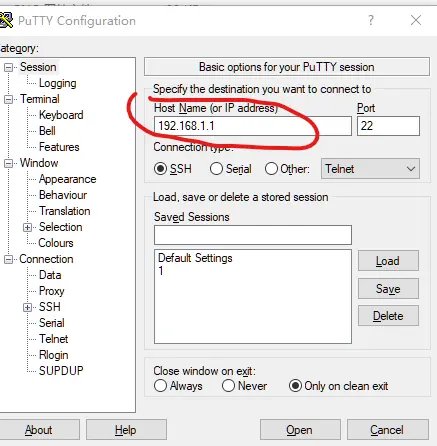
Input your server’s IP address into the Hostname field. By default, you’ll connect over port 22 for SSH access.
For demonstration purposes, I’m using
192.168.1.1, which is a LAN IP address. Make sure to enter your actual server IP address.
Before you click Open, let’s configure a few more settings to improve your connection stability.
Keep Your Connection Alive
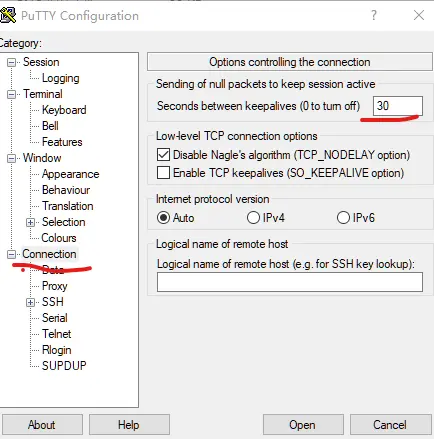
To avoid disconnection issues, it’s recommended to set a keepalive interval:
Navigate to the Connection settings.
In the Seconds between keepalives field, set the value to
30. This ensures that your session remains active even if there’s no data being transmitted.
Save Your Connection Settings
To save time in the future, you can save your session details so you don’t have to re-enter your server IP and configurations every time:
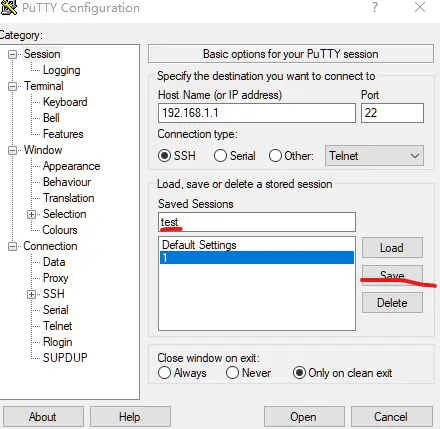
After setting up your IP and keepalive settings, return to the Session screen.
Enter a name for your session in the Saved Sessions field.
Click Save. Now, whenever you open Putty, you can simply load your saved session and skip re-entering the connection details.
Try using these settings to improve your Putty experience!
By following these steps, you’ll ensure a smoother and more reliable SSH connection to your Linux server using Putty. Don’t forget to save your configurations to make future logins quicker!